Before you work on your list any further, you should save it.
1. Select Save List As in the upper right-hand corner of the screen.

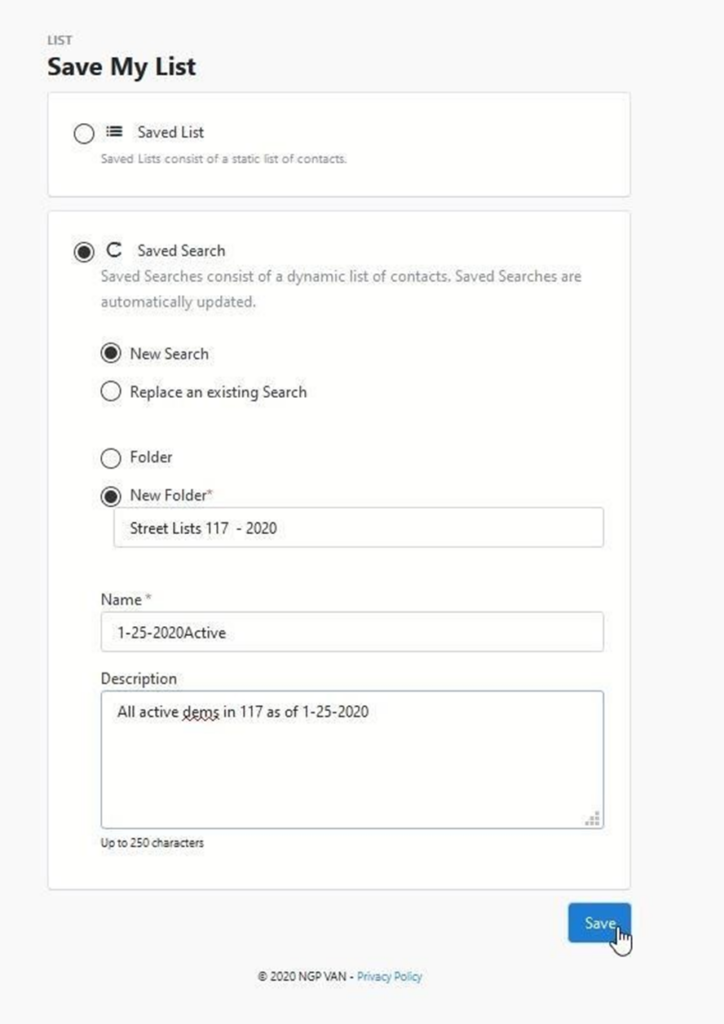
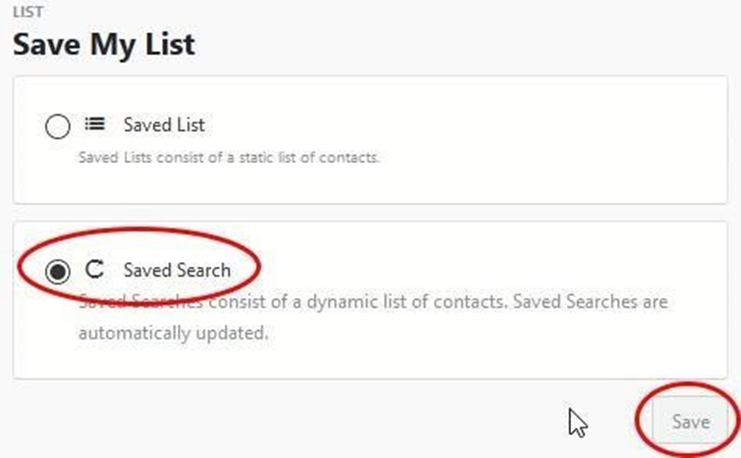
You will see a two-option menu for Save My List.
The two options are:
A. Saved List (Fixed set of people): This option freezes in time, the names of the voters on your list and all of the information about them.
B. Saved Search: This option allows you to produce an updated version of the list each time you open it. Any new registered voters will be included.
2. Fill in the circle next to Saved Search (Dynamic set of Search Criteria) and click on the Save button.
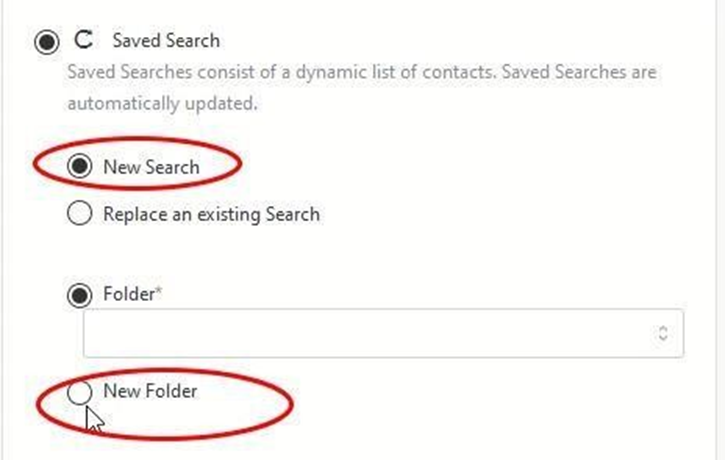
You will be asked several additional questions:
A. New Search or Replace an Existing Search,
B.Save in a New Folder or in an existing folder
3. Fill in the circle next to New Search and check the box marked New Folder.
4. Type in your New Folder Name and your Search Name.
A folder is similar to the manila folders in a filing cabinet. You put a label on the folder such as “June receipts” and you file all receipts in that folder. Here you might name your folder for a Neighborhood or an Activity such as “Grand Hampton 2019” or “Voter Registration 2019”.
Each list name is unique and should be a shorthand way of describing your list for quick recognition. For example, “2019.06.30 VR in GH and Esplanade” would mean the Voter Registration Canvass on June 30th of this year in the two communities of Grand Hampton and Esplanade.
The Description field is optional, but if you require further information to help you recall what the list was used for, this would be the place to record it.
5. Select Save.