
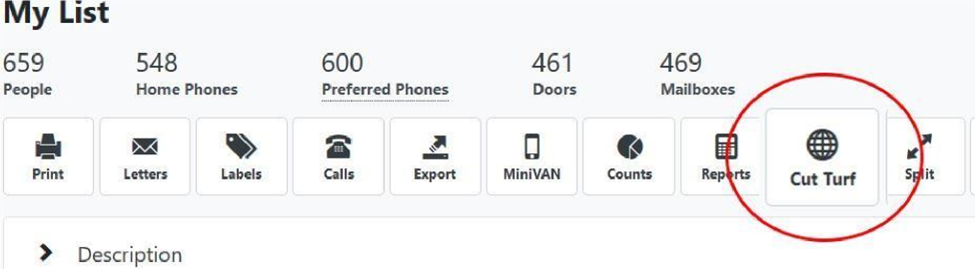
For most of you, your list will contain hundreds of people or even over a thousand! Clearly that is not manageable. The way we cut the list down to size is through a process called Cutting Turf.
1. If the current My List is already open, you are ready to Cut Turf. Otherwise, from the My Voters Main screen, Create a new List, Open the current My List, or Open a List from a Folder.
2. Select the Cut Turf icon.
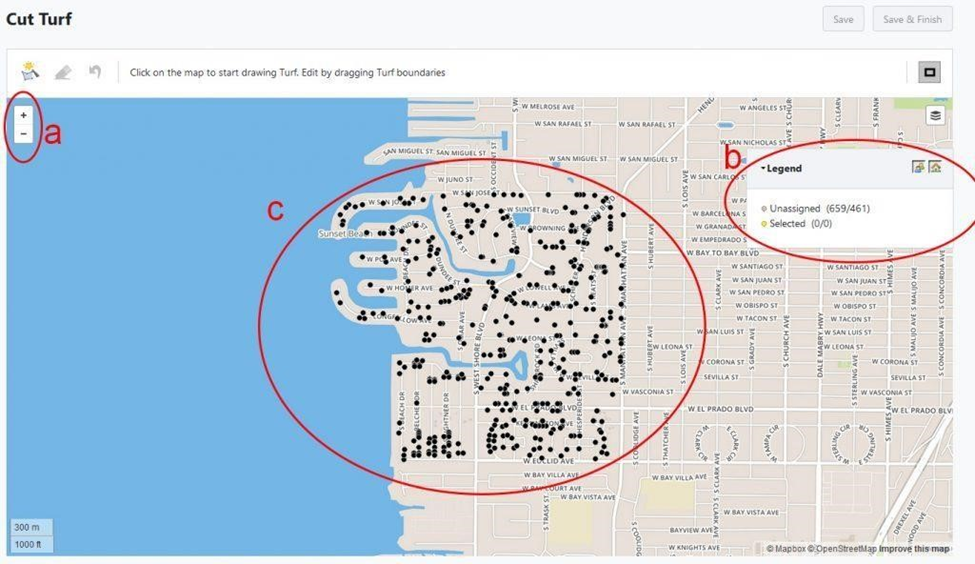
You will see the following:
Zoom Indicator
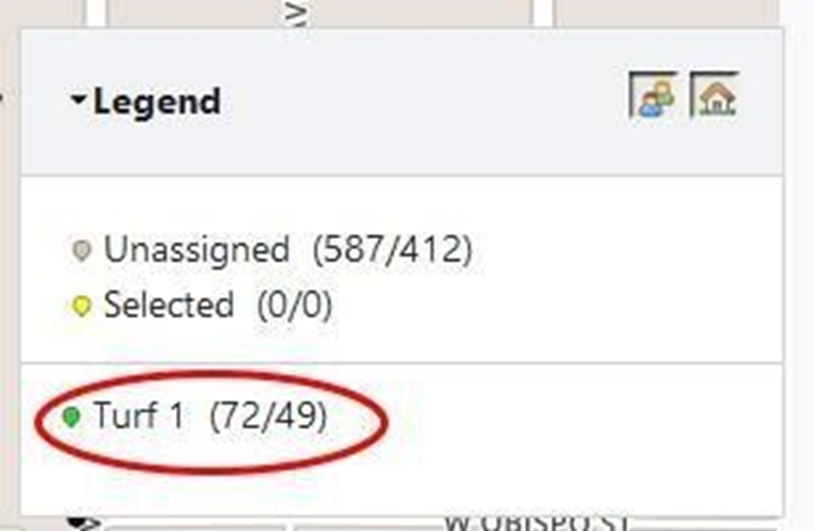
Legend – This will highlight how many homes are in the overall map compared to how many have been selected in a specific turf. The number on the left shows how many individual people and the number on the right show how many doors.
Each Dot represents a street address – which can mean a single house dot or an apartment complex in which one street address also has multiple separate apartment doors.
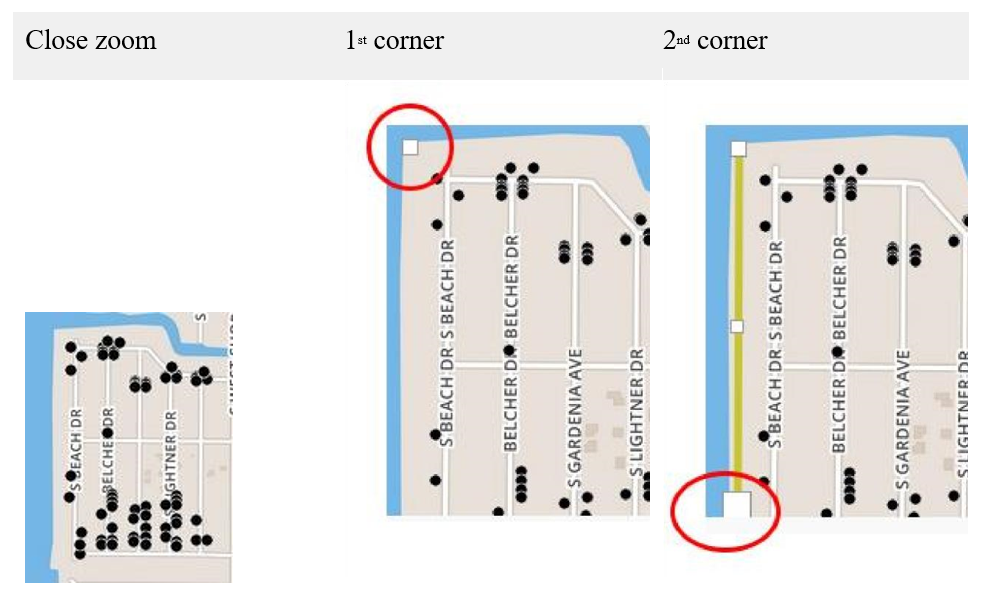
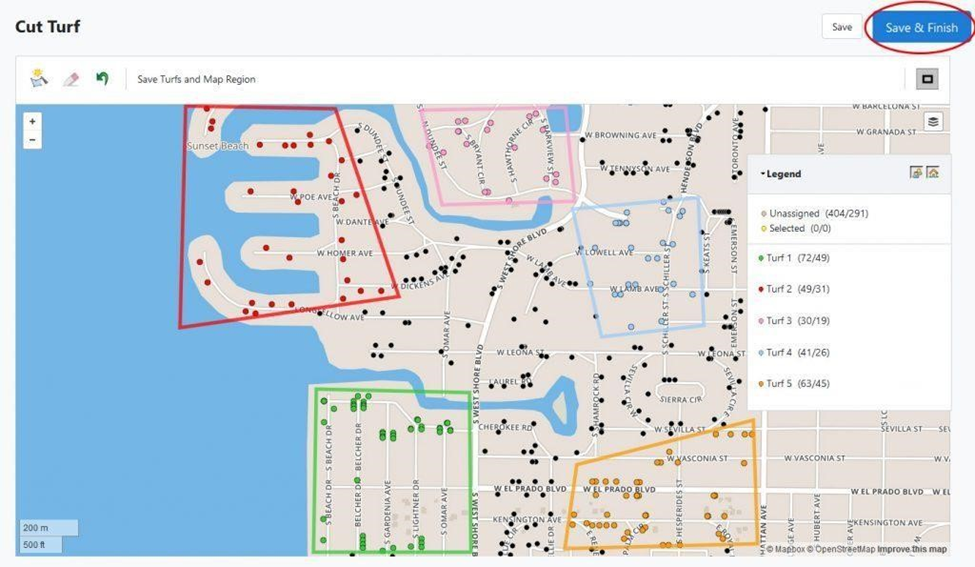
3. Let’s cut some turf.
I zoomed in closely on one section. I click where I want to begin my turf and a white box appears. I click on the next corner of the turf I am creating, and a new white box appears with a yellow line between the original box and my new box. On the next page the process is continued and illustrated. Be sure to click on the original dot to complete the turf.
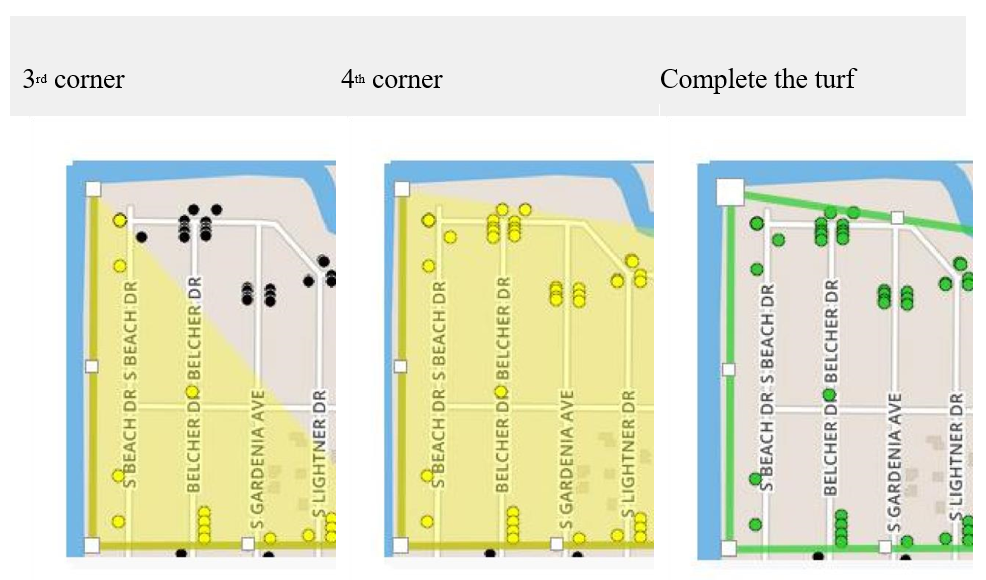
Notice the change in the legend in the upper right-hand corner of the map. A new breakout has been added showing the new Turf you created.
4. Continue this process until you have cut the number of turfs you need.
5. Scroll to the top of the My List screen and select Save and Finish.
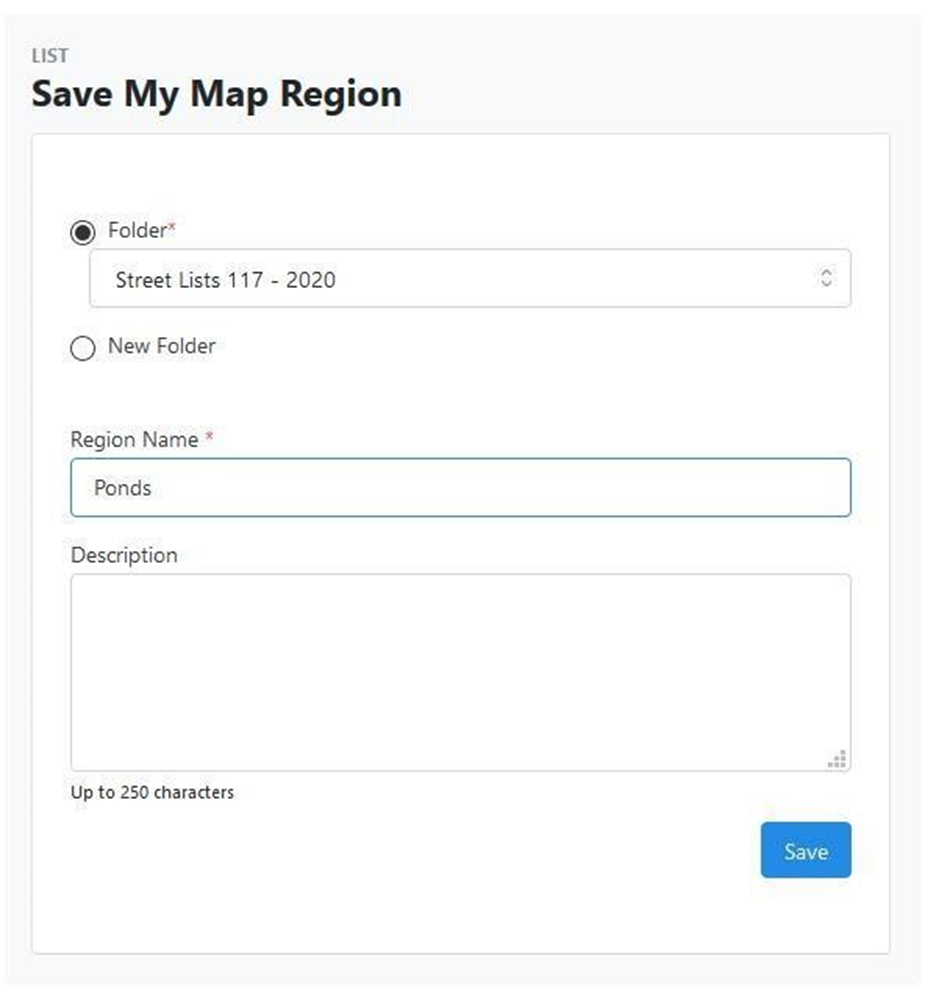
You will see the Save My Map Region screen. The process of saving your map is similar to that of saving the list.
6. Provide the folder name (or create a new one). Region name is like a List Name.
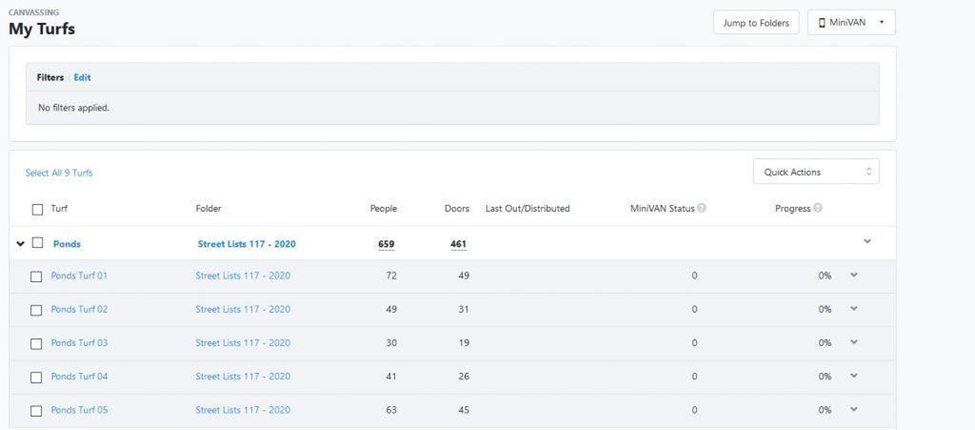
You will now see a list of the turfs you just created on screen.
Suppose you come back two days from now and you want to display that same list of turfs. How do you do that? You load a turf from the Main Menu.