The canvass results from a current printed list may be manually entered using the Grid View option on the Home screen of My Voters. If the list is expired, it is also possible to enter the canvass results for one voter at a time.

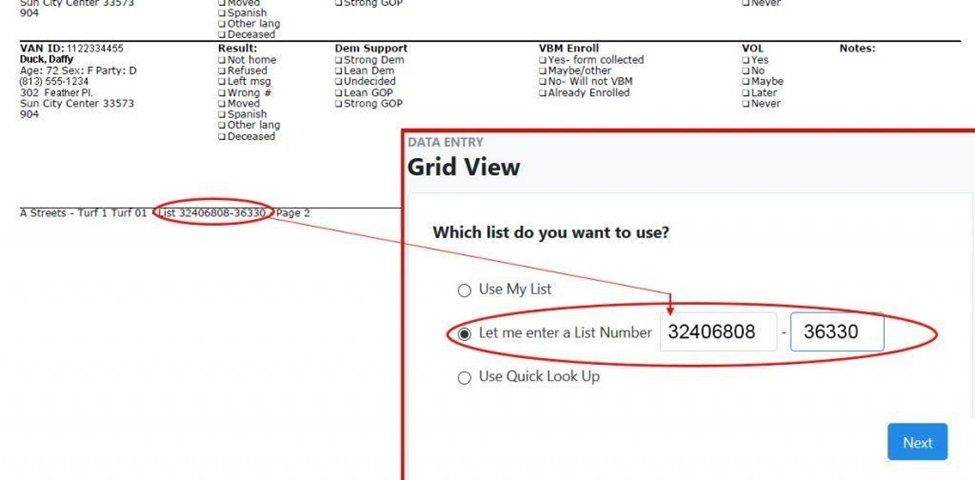
If your Street Leaders canvass using printed lists, make sure the data entry person is given the list before it expires! But, if it is expired, re-run the saved Search, then use the newly generated list number with Grid View. The names on the expired list and new list will be mostly the same.
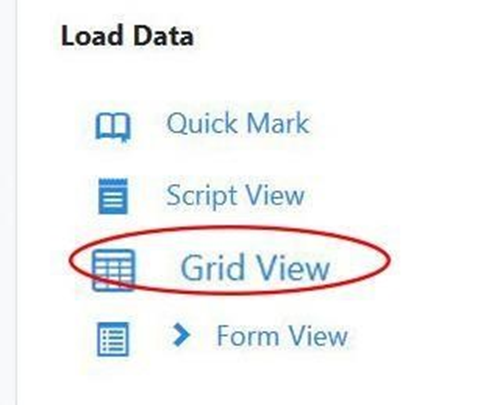
1. From the My Voters Home screen, go to the Load Data section and click Grid View.
2. Select one of the three ways to load Grid View:
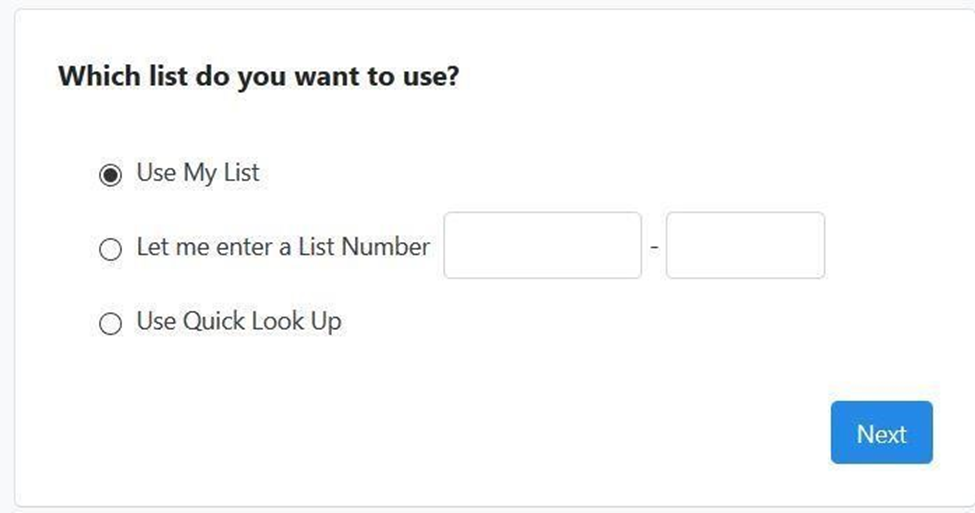
Use My List.
3. Enter a List Number . The List Number is located at the bottom left of each page of your printed list. Copy the List Number to the Grid View option box as is shown below.
Quick Look Up to enter the information one voter at a time.
4. Click the Next button at the bottom right.
When you choose either My List or enter a List Number, you will be at the Grid View options page. These are the same options you chose when formatting your list for printing. Many of the Options may be pre-filled in. Fill in the options, including the Sort order, the same way as when you created your list.
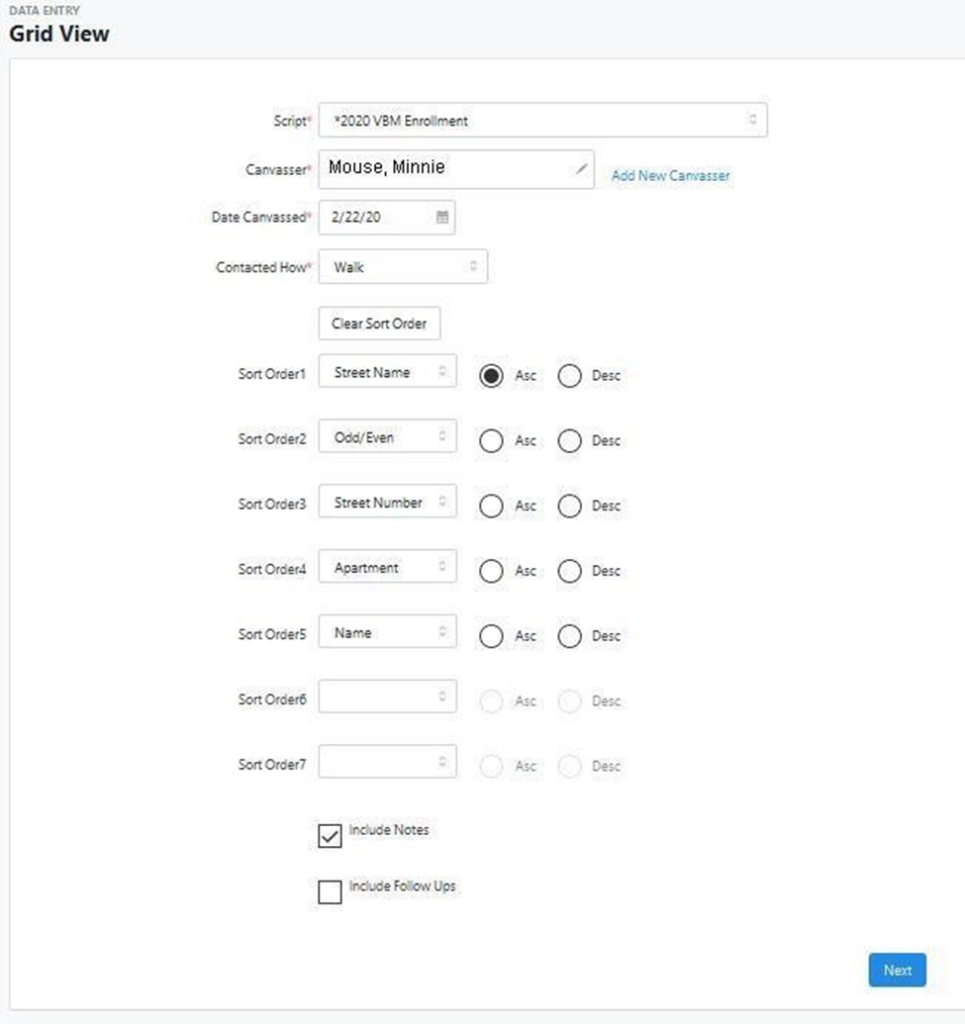
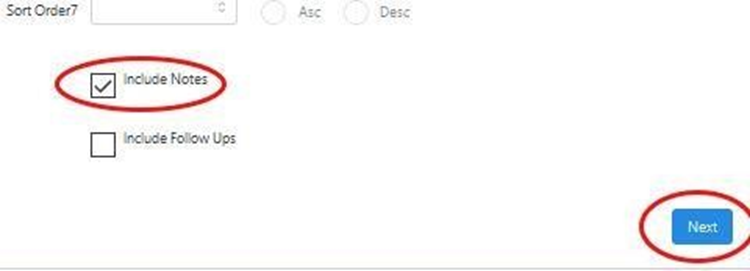
5. Click the Include Notes option near the bottom of the page.
6. Click the Next Button at the bottom right.
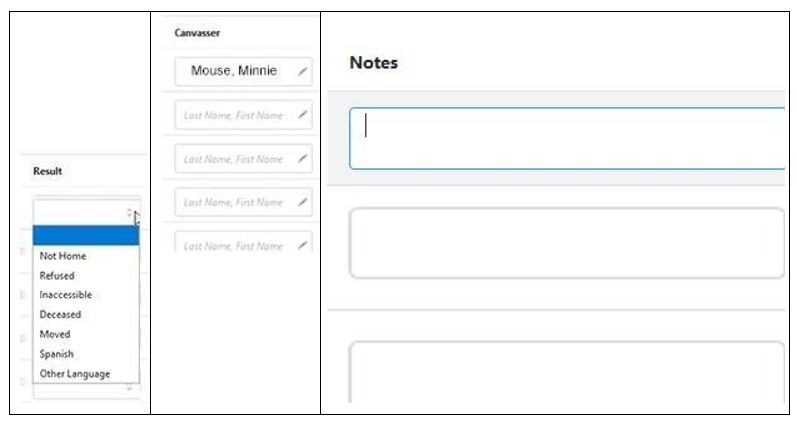
Grid View will display the people in the list.

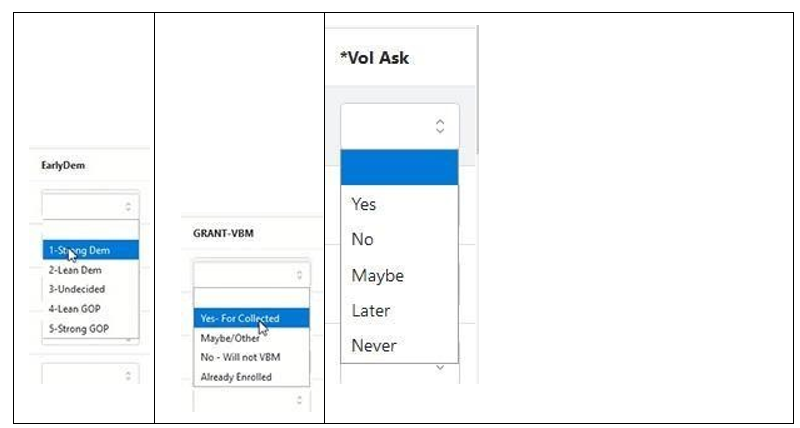
7. Input the results for each voter canvassed from the hard copy list. If you select the Survey Question response that indicates the voter could not be canvassed, the rest of the Survey Questions will be disabled.
The Choices for the Survey Questions in each drop down correspond to the choices on the printed list.
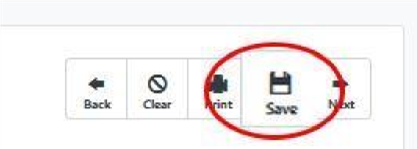
8. Click the Save button at the top right of the page. Save your work periodically.