There are two ways to access the Add a New Location function in the Voter
Registration Tab.
A. The first is from the Administration Sub-menu on the home
screen.
1. Select Locations from the Administration Sub-menu,
2. Select Locations again.
The following screen will be displayed.
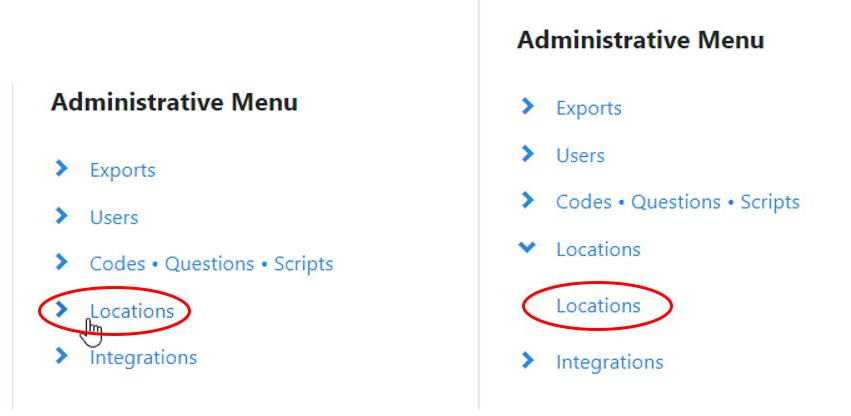
3. Select Add New Location:
(Note: Do this only for frequently used locations, not locations that are one offs.)

B. The second method of accessing the Add a New Location function is through
the Data Entry Sub-menu on the Home Screen.
1. Select Data Entry.
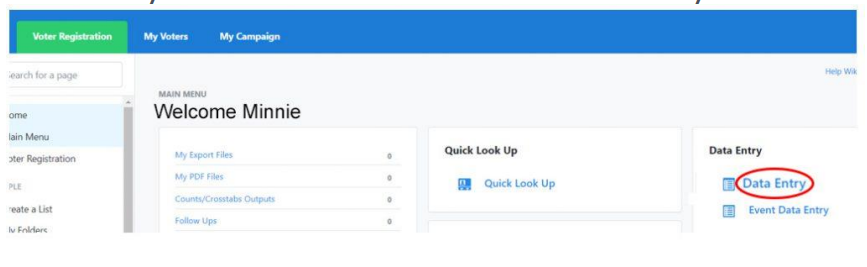
The Choose Batch screen will be displayed. You will see the option to Add New
Location.
Regardless of which method you use to get to the Add New Location screen,
this is what you will see:
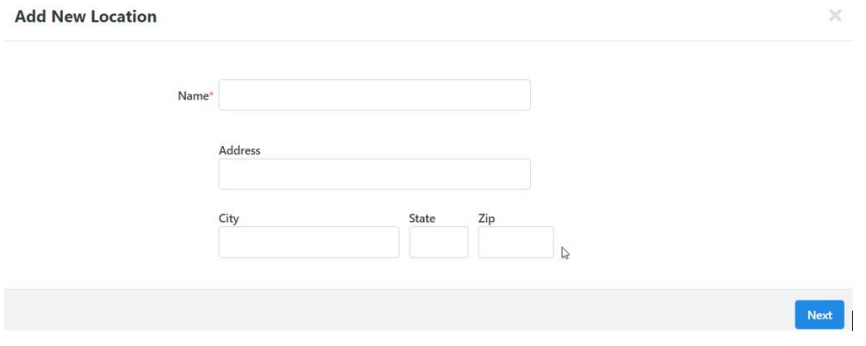
The only field that is required is the Location Name, however, it will be most
helpful to other users if you provide all of the address information as
well. Select Next.
The Locations List or the Choose Batch screen will be re-displayed depending
upon which method of access you used